$ unzip apache-tomcat-11.0.18.zip
$ cd apache-tomcat-11.0.18/
$ TC=$(pwd)5 Minute Quickstart
In this tutorial, it will be demonstrated how easily a WAR agent can be installed on a fresh Tomcat, how to verify the installation and how to access the Agent using Jolokia Client.
Preparation
In order to start on a green field, we are installing a fresh Tomcat in which the Jolokia WAR Agent is going to be installed. Download Tomcat 11 from its site and extract it:
Download the Jolokia WAR-agent (without enabled security for the test purpose) and copy it into Tomcat’s
webapps/ directory:
$ artifact=jolokia-agent-war-unsecured
$ version=2.6.0
$ wget https://repo1.maven.org/maven2/org/jolokia/$artifact/$version/$artifact-$version.war \
-O $TC/webapps/jolokia.war
If jolokia-agent-war-2.6.0.war was used, we’d need additional configuration. We need a user defined in
Tomcat’s UserDatabaseRealm realm with jolokia role. Just add this line to ${TC}/conf/tomcat-users.xml:
<user username="jolokia" password="jolokia" roles="jolokia"/>Startup and Verification
Now we can start Tomcat:
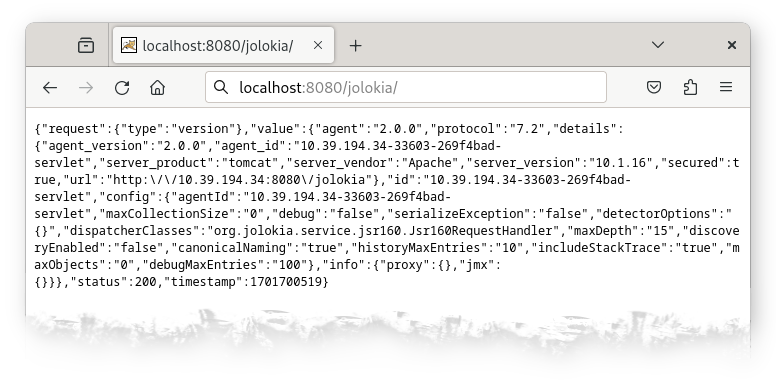
$ ${TC}/bin/catalina.sh startIn order to verify the installation, point your browser to http://localhost:8080/jolokia/version which should show (after authenticating using jolokia/jolokia credentials) something like:
We can also access the agent using curl command:
$ curl -u jolokia:jolokia -s http://localhost:8080/jolokia/read/java.lang:type=Runtime/VmVersion | jq .
{
  "request": {
    "mbean": "java.lang:type=Runtime",
    "attribute": "VmVersion",
    "type": "read"
  },
  "value": "17.0.18+8",
  "status": 200,
  "timestamp": 1770372762
}
A simple Java Client
Let’s try out the client side of Jolokia. This example will print out the memory usage of your Tomcat server:
import java.util.Map;

import org.jolokia.client.JolokiaClient;
import org.jolokia.client.JolokiaClientBuilder;
import org.jolokia.client.request.JolokiaReadRequest;
import org.jolokia.client.response.JolokiaReadResponse;

public class JolokiaDemo {

    public static void main(String[] args) throws Exception {
        JolokiaClient client = new JolokiaClientBuilder().url("http://localhost:8080/jolokia")
                .user("jolokia")
                .password("jolokia")
                .build();
        JolokiaReadRequest request = new JolokiaReadRequest("java.lang:type=Memory", "HeapMemoryUsage");
        JolokiaReadResponse response = client.execute(request);
        Map<String, Long> vals = response.getValue();
        long used = vals.get("used");
        long max = vals.get("max");
        double usage = ((double) used * 100 / max);
        System.out.printf("Memory usage: used:%d/max:%d = %f%%%n", used, max, usage);
        client.close();
    }
}
Save this code-snippet under JolokiaDemo.java. Then download
and put these libraries into the same directory as this demo class. Finally, compile the demo and let it run:
$ export CLASSPATH=.:\
jolokia-json-2.6.0.jar:\
jolokia-core-2.6.0.jar:\
jolokia-client-java-2.6.0.jar

$ javac JolokiaDemo.java

$ java JolokiaDemo
Memory usage: used:26709664/max:16492003328 = 0.161955%
If you are using Maven, it is enough to include a single dependency:
<dependency>
    <groupId>org.jolokia</groupId>
    <artifactId>jolokia-client-java</artifactId>
    <version>2.6.0</version>
</dependency>
Other required dependencies will be available transitively:
+- org.jolokia:jolokia-client-java:jar:2.6.0:compile
   +- org.jolokia:jolokia-json:jar:2.6.0:compile
   \- org.jolokia:jolokia-core:jar:2.6.0:compile
Install Jmx4Perl
|
Note
|
This section is a tribute to Perl origins of Jolokia. |
The five minutes are probably over now, but I highly recommend to install jmx4perl right now. Beside providing a Perl language binding for Jolokia, there are some cool command line tools included which are useful on their own.
-
jmx4perl is a command for exploring the JMX space by providing arguments on the command line.
-
j4psh is a readline based, colored, interactive shell with context sensitive command completion on MBean names and attributes/operations. It is a perfect tool for interactively exploring MBeans and their values.
-
check_jmx4perl is a feature reach Nagios plugin for connecting the Jolokia agent with Nagios.
-
jolokia is a supporting script for easy download and configuration of the Jolokia agents.
jmx4perl (and its dependencies) can be easily
installed with cpan if you have Perl installed:
$ perl -MCPAN -e shell

cpan shell -- CPAN exploration and modules installation (v2.36)
Enter 'h' for help.

cpan[1]>


cpan[1]> notest install JMX::Jmx4Perl
...
Jmx4Perl comes with a set of supporting scripts, which
are not necessarily required for using JMX::Jmx4Perl
programmatically.

jmx4perl
========

jmx4perl is a command line utility for accessing Jolokia agents
(www.jolokia.org). It can be used for script based exploration
and easy inspection of the JMX space.

Install 'jmx4perl' ? (y/n) [y ]
...
You will be asked for each featured script whether it should
be installed in addition to the core Perl modules. Each of
these scripts (jmx4perl, j4psh, jolokia, check_jmx4perl) will
introduce a set of new depedencies of Perl modules which in
turn might depend on other Perl modules or system
libraries. Perl modules are resolved and installed
automatically. The agent management script
jolokia depends on XML::LibXML
which requires a development version of libxml
installed locally. It is recommended to install
libxml2-dev with the package management tool of
your OS (e.g. apt-get install libxml2-dev
). Alternatively, the OS package for XML::LibXML could be
used (e.g. libxml-libxml-perl for
Ubuntu).
When using non-root installation for Perl site, these environment variables are required (cpan shell suggests adding them to your ~/.bashrc):
export PATH="$HOME/perl5/bin${PATH:+:${PATH}}"
export PERL5LIB="$HOME/perl5/lib/perl5${PERL5LIB:+:${PERL5LIB}}"
export PERL_LOCAL_LIB_ROOT="$HOME/perl5${PERL_LOCAL_LIB_ROOT:+:${PERL_LOCAL_LIB_ROOT}}"
export PERL_MB_OPT="--install_base \"$HOME/perl5\""
export PERL_MM_OPT="INSTALL_BASE=$HOME/perl5"
When jmx4perl is installed, we can try it out:
$ jmx4perl http://localhost:8080/jolokia list
$ jmx4perl --user jolokia --password jolokia http://localhost:8080/jolokia list java.lang:type=Runtime
Attributes:
    BootClassPath                       java.lang.String [ro], "BootClassPath"
    BootClassPathSupported              boolean [ro], "BootClassPathSupported"
    ClassPath                           java.lang.String [ro], "ClassPath"
    InputArguments                      [Ljava.lang.String; [ro], "InputArguments"
    LibraryPath                         java.lang.String [ro], "LibraryPath"
    ManagementSpecVersion               java.lang.String [ro], "ManagementSpecVersion"
    Name                                java.lang.String [ro], "Name"
    ObjectName                          javax.management.ObjectName [ro], "ObjectName"
    Pid                                 long [ro], "Pid"
    SpecName                            java.lang.String [ro], "SpecName"
    SpecVendor                          java.lang.String [ro], "SpecVendor"
    SpecVersion                         java.lang.String [ro], "SpecVersion"
    StartTime                           long [ro], "StartTime"
    SystemProperties                    javax.management.openmbean.TabularData [ro], "SystemProperties"
    Uptime                              long [ro], "Uptime"
    VmName                              java.lang.String [ro], "VmName"
    VmVendor                            java.lang.String [ro], "VmVendor"
    VmVersion                           java.lang.String [ro], "VmVersion"
Class: sun.management.RuntimeImpl
Description: Information on the management interface of the MBean

$ jmx4perl --user jolokia --password jolokia http://localhost:8080/jolokia \
read java.lang:type=Memory HeapMemoryUsage
    {
      committed => 532676608,
      init => 524288000,
      max => 8334082048,
      used => 53380576
    }
Next, I recommend to try out j4psh. For
getting the best readline experience, it is recommended to
also install Term::ReadLine::Gnu (which in turn
requires the package libreadline-dev to be
installed), but this is optional. Now, fire up j4psh and let
the fun begin:
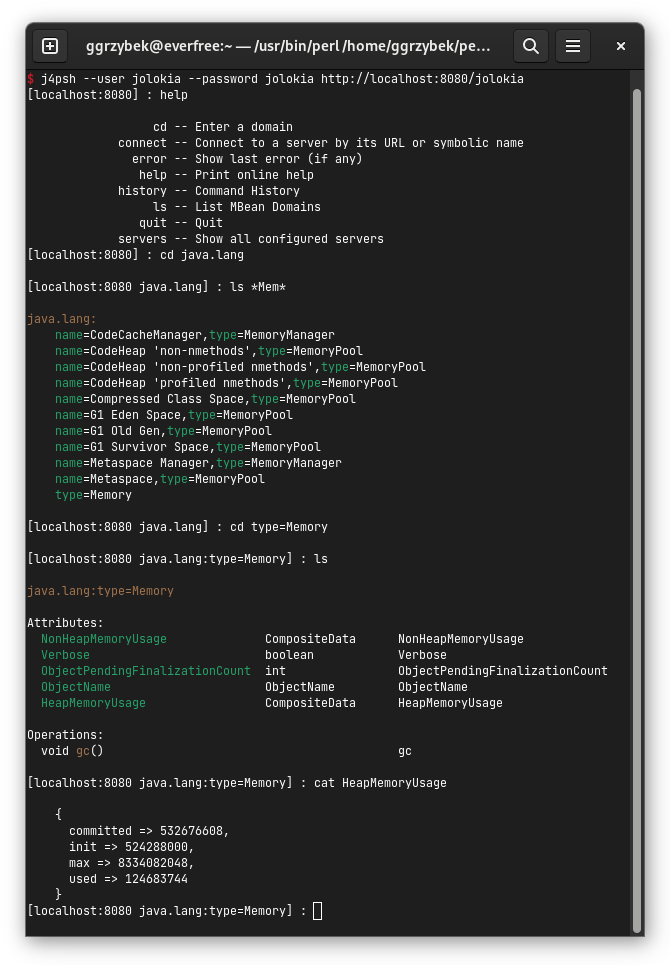
Don’t forget to try out TAB triggered command and argument completion as demonstrated in this screencast.
Summary
That’s all for now, I hope you enjoyed this first ride. For the next steps I recommend to have a look into reference manual.